The first step of working on a group story map is to have a "shared update" group created for you on ArcGIS Online. Your ArcGIS Online group will be where you will go to access, edit, and share content with your groupmates (e.g., story map, etc.) This collaborative group space will be private to your group members, professor, and librarian. Once you finish your story map, you will have the option to publish it so it is visible to a larger audience.
Our GIS librarian will need the following information to set up the shared update ArcGIS Online groups. Your professor has been provided with the necessary permissions to create shared update groups.
Group Name
Names of people who should be added to the group.
Note: We can only add people who have signed into Brandeis ArcGIS Online.
There are multiple ways to share content to an ArcGIS Online group. Here are two of the most commonly used approaches:
Sign into your Brandeis ArcGIS Online account.
Go to the Groups menu then select your ArcGIS group.
Click View Group Details to open your ArcGIS Online Group page.

On your ArcGIS Online group homepage, click the Add Items to Group button located toward the right-hand side of the screen.

A pop-up window will appear that displays the list of items available in your ArcGIS Online account. Select the checkboxes for the items you'd like to share with the group, then click Add Items to share them with the group.
Go to the Content menu in Brandeis ArcGIS Online.

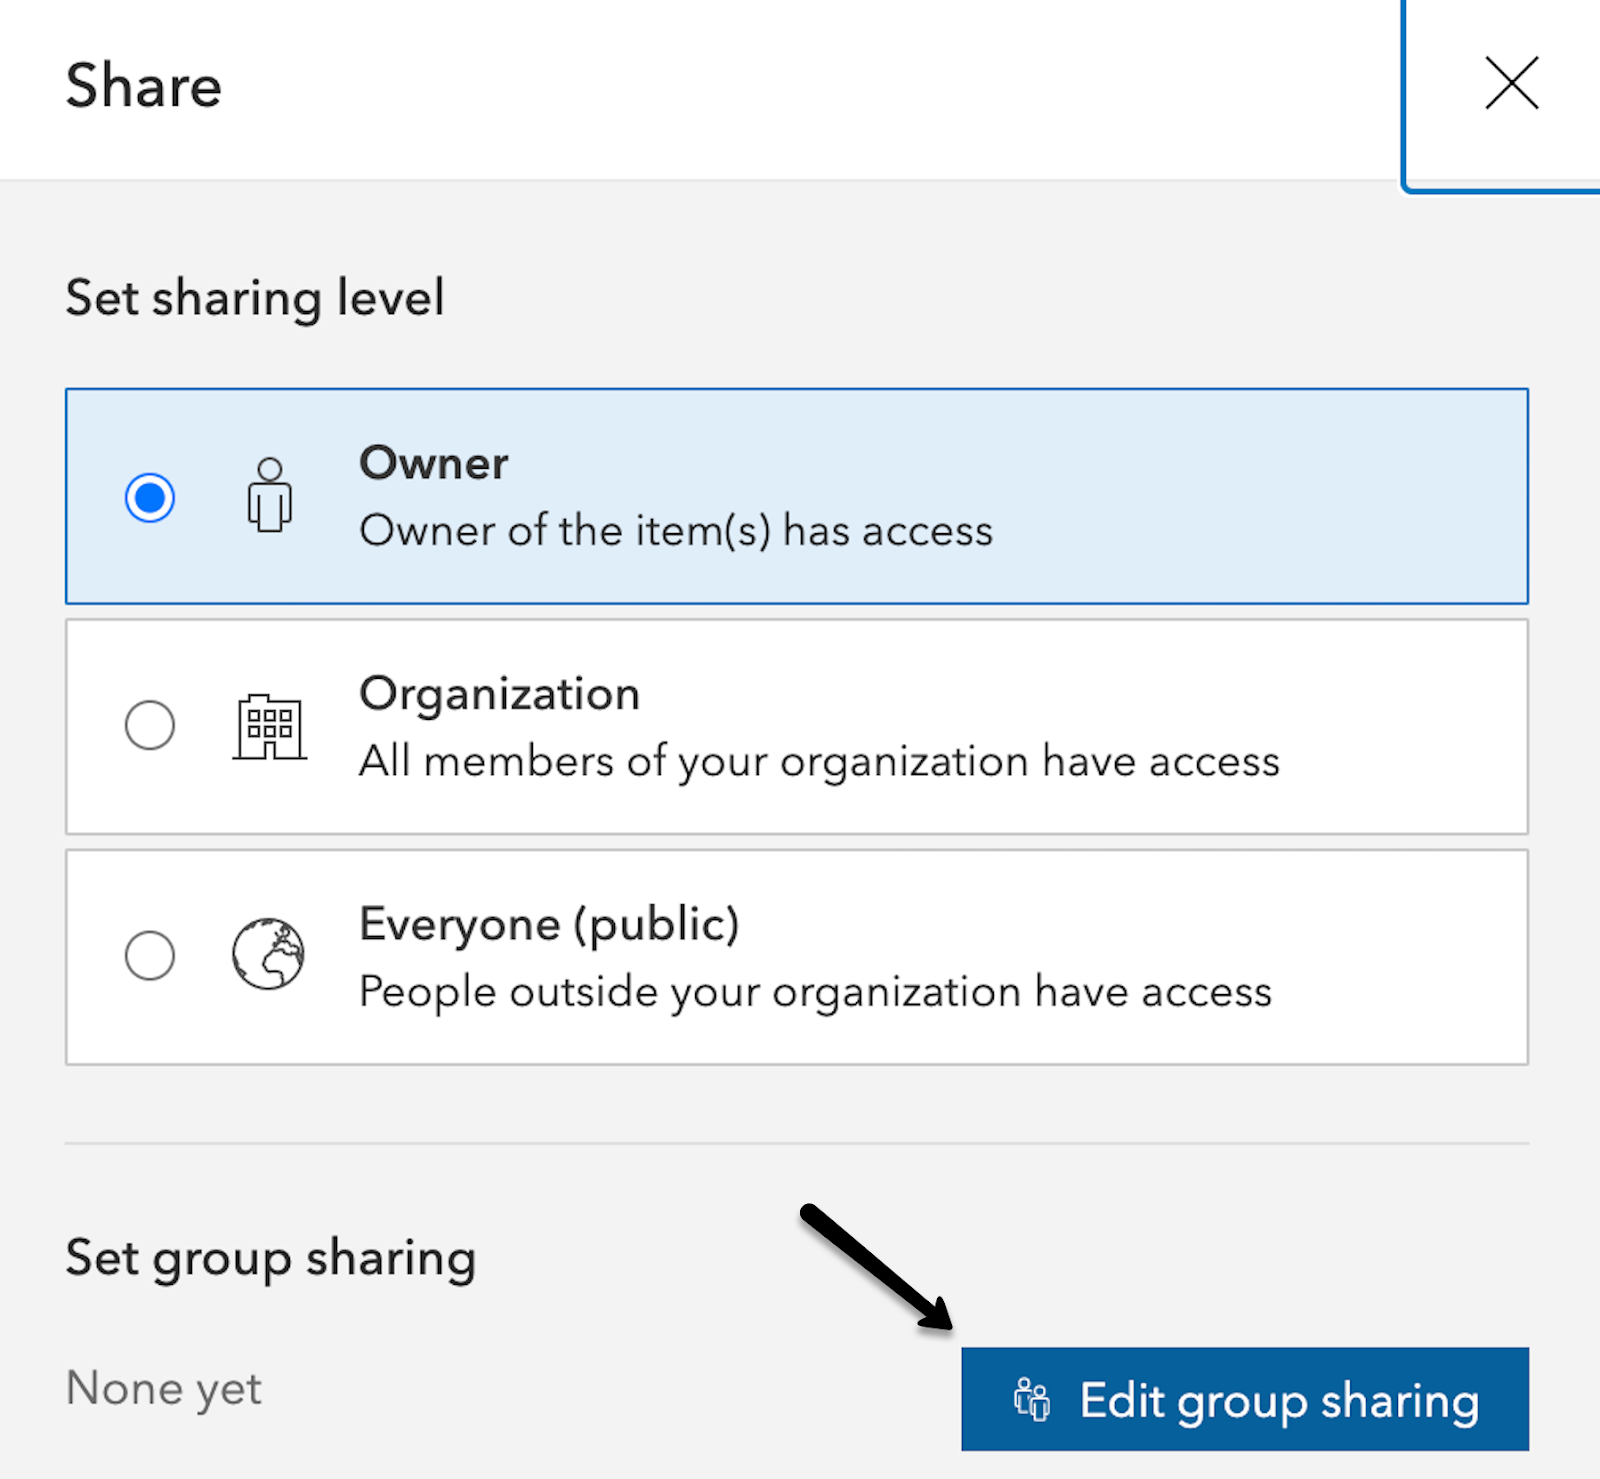
The default sharing permissions are set to Owner. Click the Edit group sharing button at the bottom of the pop-up window to access the list of Brandeis ArcGIS Online Groups that you can share content with.
Click the checkbox next to the ArcGIS Online group you'd like to share content with, then click OK at the bottom of the pop-up window to change the sharing permissions. The content is now shared with members of your ArcGIS Online group.
Members of your group can access shared content by going to the Groups menu in Brandeis ArcGIS Online.
In Brandeis ArcGIS Online, go to the Groups Menu. Find your group, then click View Group Details to open your group page.
Click the item you'd like to edit.
If you receive an error message when you try to access an item shared by a collaborator, click the ellipses (...) menu for the item to view more options. Click View Item Details if no other options appear. You will be redirected to the Item details page for that item.

If you're directed to the Item Details page for an item (e.g., a story map), you can click the Edit Story button to start editing it. Note: Editing capabilities are only available in shared update groups.

Since ArcGIS StoryMaps autosaves edits, you can only have one person editing your story map at a time, in a single browser tab. Pay attention to any warning messages the software displays to make sure you don't accidentally lose your work.
Here is the warning message you'll receive if you have your story map open in multiple browser tabs:

Here's the warning message you'll receive if multiple people are trying to simultaneously edit a story map: