Skip to Main Content
“Brandeis

ANTH 121B: Archaeology and the Environment GIS Project

Overview

If you would like to remove the white border from your plat map, you can perform a raster clip to crop it. There are a few different approaches you can use to clip rasters, but for the purposes of our assignment, we'll quickly create a polygon then clip our raster to the polygon. We'll complete this process via three majors steps: we'll create a new polygon feature class in our project's geodatabase, start an editing session to draw the polygon, then clip our raster (e.g., plat map) to the polygon that we created.

Create a Polygon Feature Class

  1. In ArcGIS Pro, add the GeoTIFF(s) you want to crop to your project. 
  2. Then go to View > Catalog Pane to open the catalog pane.
  3. Navigate to your project geodatabase, located under the Project subtab. Right-click the Default.gdb (or the geodatabase you're saving project files into), then select New > Feature Class.
    New polygon feature class.
     
  4. Create a file name for your feature class. Make sure the feature class type is set to polygon.
    Polygon Feature Class template.
     
  5. Click Finish. You don't need to work through the additional pages of the Create Feature Class wizard since we're not adding attribute data to our polygon feature class. The polygon feature class should default to the same spatial reference as your GeoTIFF. This empty feature class template will be added as a layer to your project.

Start an Editing Session

ArcGIS Pro provides an editing pane if you want to create new features, edit existing features, standalone tables, etc. You will want to start an editing session any time you create or edit data in ArcGIS Pro. This will provide you with added security in the event you make a mistake and need to cancel your changes. Changes made in an editing session are temporary until you save your changes and stop the session. If you add / edit data in ArcGIS Pro outside of an editing session, the changes that you make are permanent.


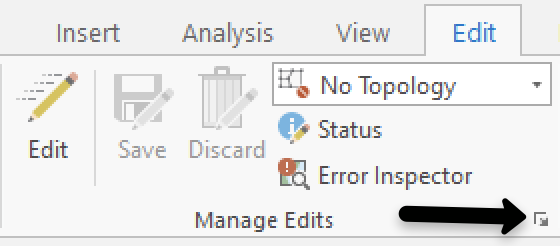
The edit button doesn't initially display in the ArcGIS Pro menu bar. You can change this setting by completing the following steps: 

  1. Go to the Edit tab in the ArcGIS Pro menu bar.

  2. Click the Editing Options icon located in the lower-right corner of the Manage Edits group.
    Editing Options.

  3. In the Editing Options window, scroll down to the Session settings. Click the Enable and disable editing from the Edit tab checkbox. Click OK to close the Editing options window.
    Enable and disable edits from the Edit tab checkbox.

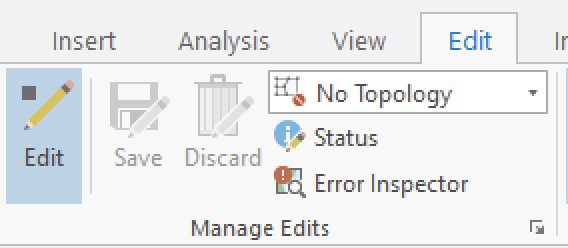
  4. The Edit button will now appear in the ArcGIS Pro menu bar. Highlight the map layer you want to edit in the Contents pane, then click Edit to start an editing session.
    Edit button.
     

Resources

Draw Polygon and Clip Raster

Draw Polygon

  1. Make sure the polygon feature class layer is selected in the Contents pane, then switch to the Edit tab and click Edit to start your editing session. 
  2. Click Create to open the Create Features pane. Select the polygon feature class template that you created. You can further specify the type of polygon feature that you'd like to create (e.g., rectangle). We'll use the general polygon feature template option.
    Create Polygon Feature Class.
     
  3. You can now draw a polygon on your map. This will act as the cropping boundaries when you use the clip raster tool. You can use the modify feature tools to adjust the vertices of the polygon you drew, etc.
    Polygon feature class drawn over plat map.
     
  4. Save your edits for your editing session. Click the Edit button to stop your editing session.


Clip Raster

  1. Now go to the Analysis tab > Tools to open the toolbox. Search for the Clip Raster (Data Management) tool.
  2. In the Clip Raster tool menu, select your GeoTIFF for the Input Raster.
  3. Select your Polygon feature class template as the Output Extent.
  4. Make sure you check the "Use Input Features for Clipping Geometry" checkbox.
    Use Input Features for Clipping Geometry.
  5. Choose a name for your output raster dataset, then click Run to run the clip raster tool. 
  6. Your clipped GeoTIFF will be added as a new layer to your map. Make sure to turn off the visibility the polygon layer and original GeoTIFF so you can inspect the clipped GeoTIFF.